Perler Step by Step: Sailor Moon
I want to go over the process of making perler pixel art. There's actually a lot more to it than I originally anticipated. So I will explain my process and will use my Sailor Moon project as an example.
Step 1: Find images to create a pattern!
I find and original tiny gif front the SNES game Sailor Moon: Another Story. I've been in love with this little pixel characters since I first saw them on the internet like... over 10 years ago. Anyways, I found good gif images here:
Fantasy Anime: Sailor Moon RPG
I found animated gifs of the same images here:
Moon Sprites
I use a mixture of Paint and Gimp to edit my images. I'm still learning Gimp and sometimes Paint is much more simple to use. So I crop the specific character pose I want and enlarge it.
Step 2: Editing and customizing the image!
I add a grid over the image to make any color or design edits that I want. As with many of the sprites in Sailor Moon: Another Story, the colors are not very vibrant. I try to put in colors that look more like the anime design of the character. I often overlap the sprite over one of their attack powers. I'm pretty proud how my alteration of Sailor Moon turned out.
Step 3: Deciding the color pattern!
I decide on which Perler bead colors match well enough with the colors on the pattern. Sometimes I change colors on the characters in Paint. In some instances the colors on the sprite look so similar that I color them differently in Paint so its easier to tell them apart when assembling the figure on peg boards.
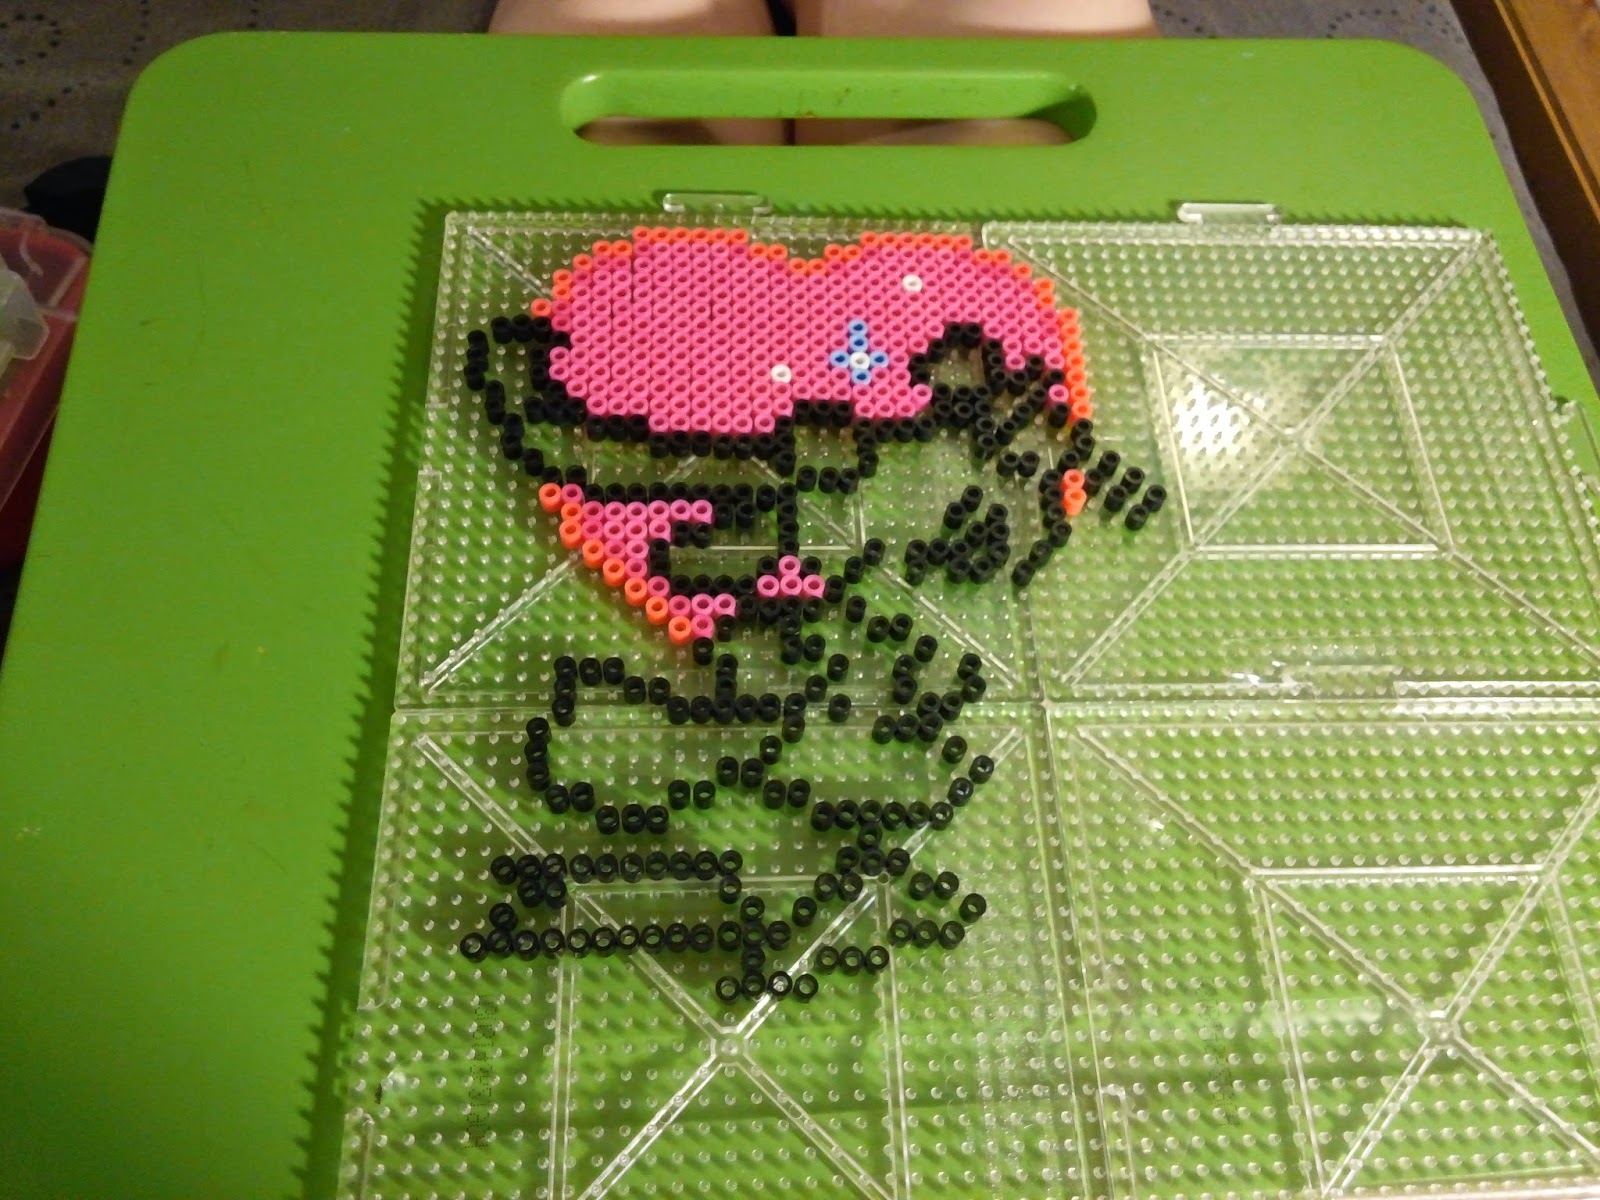
Step 4: Bead placing!
I usually need four 29x29 peg boards connected in a square shape for a Sailor Moon pixel character. Perler sells peg boards that can fit together like puzzle pieces, and I always tape the backs of them to keep them connected and sturdy (since I usually move my projects around while working). I start with one color and work my way through the pattern color by color. Once I'm done putting on the beads on the board, I check over the beads to be sure there are no hairs caught in the beads that would be fused into my figure. I have cats so sometimes a hair or two works its way in...
Step 5: Tape it up!
I use the tape method for ironing. I learned about this method online and it seems the main benefit of using the tape method is that it saves your peg boards. Ironing directly on the peg board can melt the pegs. I iron pretty thoroughly, so that I get the beads melted into squares. Looks more like pixels! I haven't found a way to get my outer layer of beads to melt as squares. Since there are not other beads surrounding all sides of the outer layer. The beads still retain a rounded edge when fused. Anyways, I use masking tape, a roll that is at least 2" wide. You could use smaller, but then you would be doing more taping! ugh.
Strip by strip I apply the tape over the beads, slightly overlapping the previous piece of tape.
You have to be very careful when applying the tape. Hold the tape taut over the beads and lay it over the beads. I am very careful with this process. Hesitation or last minute straightening of the tape while too close to the beads can get the tape stuck to some beads and you'll unintentionally remove them. Once tape is applied in strips over all beads, I am sure to apply pressure to ensure all beads are stuck to the tape. Next I poke holes through the tape at the center of every bead (I use a long nail to poke the holes). Its tedious, but they say this helps air flow through the beads while ironing. Air can get trapped inside the beads while ironing and keep the holes from closing.
Once I've poked all the holes I slowly remove the figure from the pegboard by holding onto the tape. I cut off any particularly long pieces of tape before ironing.
Step 6: Ironing!
For ironing, I set the iron on high and use parchment paper. My favorite so far is Reynold's parchment paper (sold as a roll). I don't like using the paper provided with the Perler beads because the creases of the folds can show through onto your project. I iron the beads thoroughly so that they melt completely as squares. I set books on top of the parchment so that while cooling the project will not curl. Once its cooled I pull off the parchment paper and slowly remove the masking tape. It leaves hardly any adhesive on the beads. I then flip the project over to iron the other side. The parchment paper goes back over it, and then I iron just enough to melt the beads together, I leave the holes in the beads intact. I put the books back on top and cool again.

Hooray! Then that's it! I iron the best I can the first time. My preference is to close up the holes in the beads on one side (the side I iron first). Most of the time there are several beads that aren't closed. Its just the way the beads melt and how well I ironed it. Black beads take longer to melt... which is odd and inconvenient. I've noticed clear beads are a bit stubborn too. I wouldn't recommend a second ironing to try and close up any remaining holes. The couple times I've tried it is leaves a strange shiny effect pattern on the beads. Boo.
But that's my process. I think there are different techniques out there and everyone uses what is best for their desired results.
Perler colors used: Black, White, Grey, Dark Grey, Light Brown, Tan, Sand, Peach, Red, Hot Coral, Magenta, Pink, Bubblegum, Light Pink, Pastel Yellow, Yellow, Cheddar, Toothpaste, Blueberry Creme, Neon Blue, Clear.


No comments:
Post a Comment